If you’re like me, every time you empty a box, you take a step toward the recycle bin, then stop dead in your tracks. The wheels turn. You ask yourself, “How can I upcycle this?” You tell yourself, “It’s got to have another use.” So you store it. With all the other boxes that have another use, even if that other use has yet to be discovered. Sometimes I actually use them. Most of the time they make their way to the recycle bin.
We use a lot of wax paper in this house. No, really, I mean a LOT .
I use it to wrap sandwiches for lunches. I use it to clean my iron. I use it to catch paint splatters when I’m working on small projects. I use it to line cookie sheets to make candy. Etcetera, etcetera, etcetera.
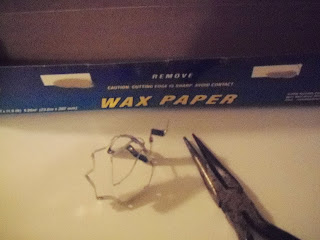
I’ve never really though about saving the boxes because of that metal cutting edge. But today I had a thought as I headed to the recycle bin with the blue box in my hand: I’ll take that cutting edge off and upcycle this baby!
So with needle-nosed pliers in hand (please be really, really careful doing this!), I gently pulled and twisted the nasty row of teeth into a mangled mess that was completely dislodged from it’s host.
Now to decide what to do with the box. (Yes, of course I saved the cardboard tube inside. It’s in the storage bin with the other 347 cardboard tubes that I need to upcycle.)
With Valentine’s Day coming up, I decided to cover the box and fill it with goodies. First I gave it a good coat of paint to mask the blue and the writing. Use the cheap paint for this. No one is going to see it. I stock up on the cheap stuff for just such occasions.
While the paint was drying, I rummaged through my baby quilt scraps and found the perfect piece to cover the box. Tiny roses on white cotton. Armed with Mod Podge and a good short-haired brush, I applied strips of fabric to the entire exterior of the box. I use a brush instead of a sponge applicator for fabric decoupage to secure the edges without disturbing the previous piece.
I started on the bottom and worked up the sides. After allowing these sections to dry, I was able to flip the box upright and work on the front, back, and lid. It was a process. LOTS of drying time.
Instead of wrapping the fabric strips under the lid, I chose to leave them loose and trim them off once dry. In the next photo, the box is laying on its back with the lid open. You can see the edges of the fabric forming an overhang around the lid.
With the edges trimmed away, I added some fringe to the box, starting in the back and working around the top and down the front of the lid.
I glued a strip of white paper under the lid to give it a clean finish.
The now-pretty box is just the perfect size for Lemon Crisp Cookies. You can get the recipe here.
Line the box with wax paper before lining the cookies up on their sides. Fold the wax paper over the cookies neatly, wrap the box in a bow, and gift it to a sweetie in your world.
I need to make these throughout the year and use them for holiday goodie gifts, teacher gifts, thank you gifts, whatever gifts!
Pin It


No comments:
Post a Comment