Thursday, January 26, 2012

Super Bowl Activities for the Kids

Kids and football don't always mix well. You with me on this one? The adults want to watch the game; the kids don't want to let the adults watch the game. I'm about to share some ideas for activities to keep the little ones occupied during the big game. So listen up.

Super Bowl will be here before we know it, and party planning is underway in many of your homes, I'm sure. We are lucky enough to be going elsewhere for the game, so no cleanup for me...yay!


I don't much care who wins this game. I'm a Carolina Panthers fan, and I'm also a Baltimore Ravens fan. So I don't have a dog in this fight. However, that does NOT mean I'm not going to enjoy the game.

                                                      The rest of y'all can stay in the kitchen!

Are you a fan? Or do you stay in the kitchen? I know, I know, real women are needed in the kitchen too. It's just that this real woman would rather be watching the big game.

The New England Patriots, with Tom Brady at the helm....

OR

The New York Giants, with cutie pie Eli Manning?
Who will you be pulling for?


While some of us will be screaming and hollering at the flat screen with the men, there will be likely be some kids in the kitchen who need something to do. Face it: if you don't give them something to do, they'll come in to bug you while you're trying to figure out if that guy stepped out of bounds before he made it to the end zone. They're only going to show the replay 47 times while the review is underway, and you need to see all 47 of them so that you can decide whether or not the ref is doing his job. You certainly don't have time to turn on your nice mommy voice and cater to whatever whim your child may have at the moment. You spend your life doing that. Today is yours! 

If you're smart, you'll hire a sitter for the kids. Even if the party is at your house. You can have a party for the kids in the kitchen while you grown-ups are having your own party in the family room! Then you can tell all your friends to bring their kids, and you can all chip in to pay the sitter!

                              Pay your sitter well. She's working her butt off to entertain your kids!!

Your sitter, whether it be the girl down the street that you use every Friday night or one of your girlfriends who can't stand football because of "all the violence," she's gonna need a plan to entertain the masses. The plan is up to YOU, and I'm here to help. There are all kinds of activities for kids, and none of them will break the bank. You probably have most of the supplies for these activities already, since I don't know many kids who go through life without a scissors, glue, and crayons. So here's a quick lineup of stuff to keep those little guys and gals busy so you can review all the plays you want.

DLTKids has tons of ideas for every theme imaginable, one of which is FOOTBALL.

Here's a few of there coloring pages. You can copy and paste them to print out, or you can visit their site and print from there.


There are other sites out there too. Just google "football coloring pages" for tons more options.

This site has coloring pages for all the NFL helmets.

And there's more than just coloring for the kiddos. Here's a wordsearch I made using Puzzlemaker.
You can copy and paste this one, or you can go to Puzzlemaker and create one of your own!

Here's a cute football wreath that gets all the kids involved:

Just have your sitter help them trace their handprints onto construction paper and cut them out. The handprints can be glued onto a cardboard form that the sitter has created while the kids were coloring. A football template can be made from the football coloring page earlier in this post.

Use this template (blow it up to whatever size you want) to cut out team pennants and decorate them.

If your sitter is feeling a bit more adventurous, purchase a plain white tee shirt (large enough to fit like a jersey) for each child. You could also ask the moms and dads to provide these for their kids. Get some fabric paint, spread some newspaper (a tarp may be more appropriate), and let the kids create a team jersey!

Here's a little cut 'n paste football player made from a TP roll. (I know you upcycle your empty rolls, so now you have a project for them!)
 
You can find the info for him at DLTKids too.
 
So there you have it, a brief roundup of ideas for the tykes and kiddos on football day. If the ages of the children vary widely, you may want to consider two sitters. Of course this may require two separate spaces in your home, so go clean the playroom!

Tuesday, January 24, 2012

Lyle's "Font"astic Adventures

Yesterday I shared some pretty interesting fonts with you. We discovered that there are TONS of fonts out there, all free for the taking, and TONS of things you can do with them. I had a special request from a viewer for some kitty fonts. Okay, so she's not just any viewer; she's my daughter, and like her mama, she loves cats.


                                          This is her sweet Ragdoll, my grandkitty, Lyle.

Anyway, all I had to do was google "kitty fonts" and instantly I had a HUGE list of sites advertising precisely what I wanted. I chose Fontspace, and I was not disappointed. There are three pages full of fonts that are all things feline.

So here's a sampling of what I found.


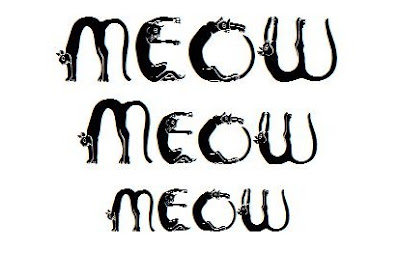
    The purrfect monogram


                                                                     Heartfelt purrs


Cat Nap (in heels, no less!)


all-occasion cat


                                                                         Too cute!


                                                                     Yoga Cats


                                                                  Sunshine Felines


And my absolute favorite.....

                                                              Kitty Doodles


These are all perfect for embellishing. The doodles are so convincing, you could use them in margins, and no one would know that they were not your original artwork. I use the term "artwork" very loosely here. 


A great tutorial for downloading new fonts can be found here.


So go create something feline, and clean the litter box!

"Font"astic Creations

There are so many wonderful fonts out there, and they're freefreefree for the taking. It does take a bit of time to download a whole collection and add it to the fonts in Word, but it's well worth the time and effort.

I recently downloaded fonts from MissTiina and Fonts101, and I'm amazed at all the cool stuff I got! Not only can a good font serve to change the tone of your writing, it can become a project in itself.

These little doodles are actually the letter "B" in MTFDoodlewhats from Fonts101. By simply pressing a single key on the keyboard, you get this little string of hearts! I just added Auto Shapes to frame the image. Prior to the edit, it looked like this:

You can make them any color you want, because they behave just like a letter.
Take a look at some of the other neat characters in Doodlewhats

 Each of the words in this font is achieved with the single stroke of a letter on the keyboard. Wild. Love it.

The Sweet Nature font at MissTiina is filled with adorable little shapes.


Any of these shapes, when enlarged, makes a darling little picture all by itself.

Imagine the projects with this collection!

Here are a few more to whet your creative appetite....


                                                                        Sweet Dings

                                         Heart Sketches, just in time for Valentine creations!

And using the fonts above, a little creation from a combination of them:


 It's amazing what you can do with fonts. The great thing about them is that there are so many FREE fonts available. There are also some good tutorials for adding them to your existing font collection. This one is especially easy to follow.

 
Click on image to go to tutorial. (opens in new window)
                                            

So start creating! Don't forget to send some pics of your creations. Thanks for stopping by!
Pin It

DIY Valentine Printables

Pin It


Picnik is closing. Yep, it's true. My favorite photo editing site is coming to an end. So sad.

No more fluffing clouds. No more picking blackberries. No more buttering sandwiches.

The GOOD NEWS: They will be up and running until April 19th, and all the premium stuff is now FREE! So get it while it lasts. (For those who have been paying for the premium stuff, you're all getting a full refund!)

I used picnik to make the Valentine printable above, and it's soooooo easy to do. I know, I know. A lot of you have been creating things like this forEVER, but bear with me while I share the tutorial. (I ask your forgiveness ahead of time for the pictures. Apparently photographing my computer screen isn't within the capabilities of my camera.)

The first thing you have to do is create a blank Paint document. What is a Paint document, you ask? Paint is a program in your computer (yes, it's there) that allows you to create all sorts of neat stuff, but we'll talk more about the elements of Paint another time. You can find this program under Accessories in your list of All Programs. Simply open it and save it as a jpeg on your desktop. It is a blank white nothing at this point.


Open the Picnik home page  and upload the file you just saved on your desktop. Again, it will look like a big, white, blank page; but trust me, it's there.


From the tabs at the top, choose Effects. Scroll down to Duo-Tone. Click on the Second Color box, and choose your background color. (The First Color box does not come into play in this project.)

Click Apply, and instantly you will see that your file is no longer blank!

Now go to the tab for Basic Edits. Click on Resize. This is where you will turn your rectangular image on its side to that it has a vertical orientation. Uncheck the Keep Proportions box. The first value is the width, and the second is the height. You can play with the numbers until you get the size rectangle that you want. Mine is 800x1200.


Click Apply to save the dimensions. (You can always come back and resize again later if you need to.)

Now click on the Frames tab. Choose what type of frame you would like. Play around with a few of them to see what best suits your project and your taste. You can always click Undo if you don't like what you've created. I chose a Museum Matte. I like that it has two different colors.

                                                 Again, sorry for the picture quality here.

Now you are ready to add your text. Click the Text tab. You will add your text in the box in the upper left corner of the screen.


You will have to create the line breaks, or it will come out in one loooooong line of text that won't fit your project. Once you have typed your text into the box, click Add. You may have to play with it for a while to get it exactly how you want it. You can drag the text box all over the screen to place it. Choose a Font. Choose a Font Color.

Now click on the Stickers tab.  There are literally hundreds of options here, and since they're all FREE, you can choose to add whatever you'd like! I chose the tab for Hand-Drawn Hearts.


You can alter the sticker once it's added by right clicking on it for options. You can change the color of many of the stickers, and you can resize all of them. Drag them to the perfect spot on your creation.

Save your project to your computer by clicking on the Save and Share tab.

Say Ta Da! and sit back and admire your work! Print it out, frame it, gift it to someone special in your world. And don't forget to send me pics of your project!

Paper Rosettes

Pin It


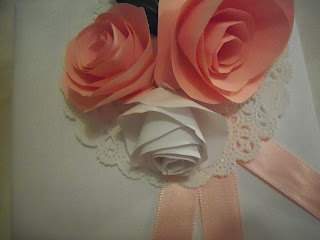
These little gems can be used to embellish anything from gift boxes and tags to picture frames and lampshades.


You will need:

            Paper of your choice (plain paper is easier to work with than cardstock)

            Scissors

            Glue gun

            Bead for center (optional)


All cutting is done without a pattern so that there are no lines on your finished flower. Don’t be intimidated. It’s super easy. You may want to practice on a couple to get the hang of it, but you’ll be a pro in no time.


Begin by cutting a wavy circle from your paper. I used ¼ of a standard sheet of paper for these little rosettes.


Then cut a wavy spiral into the circle, keeping the width of the spiral as constant as possible.


Now you are ready to form your flower. Starting at the outer point (the point where you began your spiral cutting), begin rolling the spiral strip into a snug coil.


Continue rolling around the spiral until you reach the center. You will have something that looks like this:


Now set the bottom of your rosette on your work surface and allow the flower to unfurl a bit, until you get the desired look.


Remember: roses in nature are not perfectly symmetrical, so it’s okay if yours isn’t.
 
At this point your rosette should be resting on the last bit of paper in the center of the original spiral. This is where you want to add some hot glue. Using a pea-sized glop of hot glue, press your flower from the top, forcing all the layers down into the glue. Hold it in place for a few seconds until the glue cools a bit, making sure that everything is attached at the base.
Now you have a creation similar to this:


If the center of your rose is exposed, as mine is, you can simply add a bead to hide the glue mess. If your coil remained nice and tight in the center and you can't see that mess, congratulations, no bead necessary.

Your rose is now complete.
Say Ta Da! And go embellish something.  Send me pictures please!


The tutorial for this sweet pillow box is here.