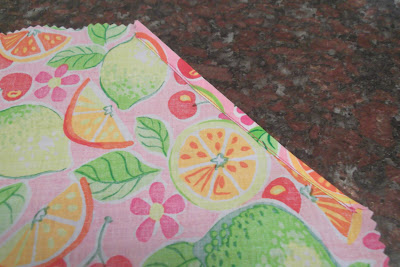
You've seen pillow case dresses popping up all over blogland lately. They're cute as cute can be, and quite easy to put together. Here's some shots of the batch I recently made. I'll post a tutorial for these little gems later today.
Periwinkle Delight
Breezy Aqua
Gingham & Eyelet
Cheerful Brights
I'll get the tutorial up this afternoon, so stop back for the easy instructions!
AS PROMISED, HERE'S THE TUTORIAL FOR THE DRESS!
This little dress is one of the easiest projects to put together. It's definitely on the beginner level of sewing, so all you beginners out there, jump right in. It took me 30 minutes to put one together, so you can make one for each of the sweeties in your world in an afternoon.
There is no real "pillowcase" involved. You will need approximately 1/2 yard of fabric for the dress (size 2-3T). Adjust the amount of fabric according to the size of the child. I chose to use two cooridnating fabrics. Dig through your scraps to find treasures that you thought you'd never use. This project is perfect for scraps.
Start by measuring your little girl from shoulder to knee. Add 2 inches to this number. This will be the length of the dress. Next measure around her waist and add 4 inches. This will be the circumference. (You can make the dress fuller by adding additional inches to the circumference. One half of the circumference is the width of the pattern. (I know this does not follow geometric rules and formulae; it's okay. Trust me on this one.) Now you have the measurements you need to make your pattern.
Using a piece of craft paper or a brown paper bag, draw a rectangle using the length and width measurements you just took. Cut out your rectangle.
Armhole angles:
On the top of your rectangle, measure in from the side 2 inches and make a mark. From the top, measure down the side (length side) 3 inches and make a mark. Join the two marks with a straight line. Repeat this process on the other side of the pattern.
You will have something that looks like this:
Don't panic. Yours will be connected at this point. I had already cut the bottom away when I took this picture.
If you plan to use contrasting fabric on the bottom of the dress, cut a piece from the bottom. My bottom piece measures 6 inches.
Fold each of your pattern pieces in half and lay each one on the fold of the fabric. You will cut 2 top pieces and two bottom pieces/strips.
With right sides together, sew one to piece to one bottom strip with a 1/2 inch seam. Press your seam UP toward the top of the dress (don't skip the pressing).
Repeat with the other top and bottom pieces.
On the right side, topstitch close to the seam on the TOP piece of the dress. (You are sewing into the seam that you just pressed UP on the wrong side.) Complete this step on both sections.
Now it's time to short-hem the armholes. To short-hem, press the raw edges under 1/4 inch. Fold over that pressed edge another 1/4 inch, hiding the raw edge. Sew in place. Finish all 4 armhole edges in this way.
You now have two identical sections: one dress front and one dress back. There is no need to decide which is which, but I will refer to them as FRONT and BACK to save confusion.
With right sides together, pin front to back, matching up the seams that connect the top and bottom. Sew down each side using 1/4 inch seam. Press your seams open.
Short-hem the bottom of the dress. I used contrasting thread.
To finish the top edge of the dress, press the raw edge under 1/4 inch.
Then fold the pressed edge in, allowing enough room to accommodate the ribbon you are using. Sew in place to form the ribbon casing.
Cut two pieces of ribbon 30 inches long. Using a large safety pin, thread on piece of ribbon through each casing, leaving equal lengths exposed on each end.
Gather the dress to the center of the ribbons, tie in bows on each shoulder. Say Ta Da! You're finished! You have created your first pillowcase dress. Now go make a few more! Now that you know how to assemble it, the next few will go together in a snap.
I'd love to see your finished work!


Adorable, Lisa Lynn!!!
ReplyDeleteI really loved reading your blog. It was very well authored and easy to undertand. Unlike additional blogs I have read which are really not tht good. I also found your posts very interesting. In fact after reading, I had to go show it to my friend and he ejoyed it as well! Leather jacket women
ReplyDeleteThank you very much for this great post. following website
ReplyDelete